Creating new customers #
To create a new customer on ConnectPOS, please follow these steps:
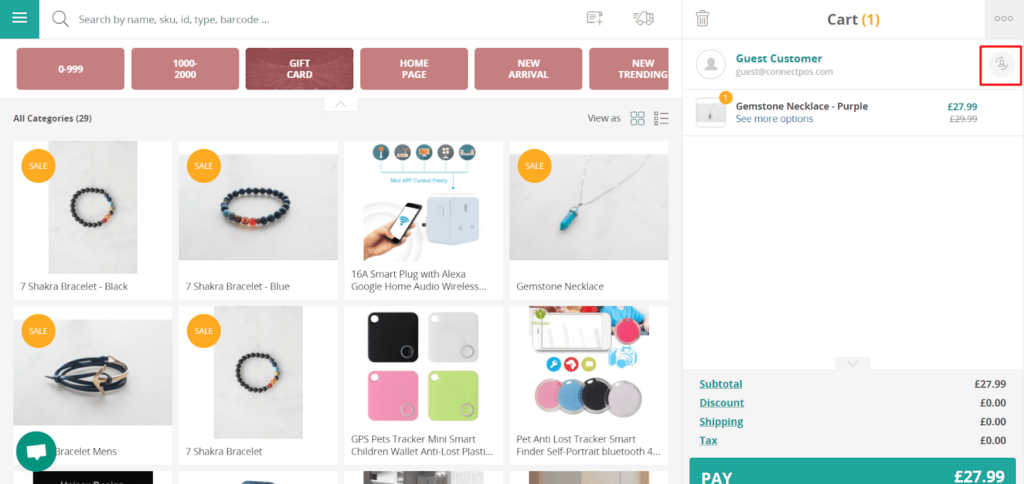
Open Sell Screen.
At the “Cart” section, click on “Change Customer” icon.

“Customer List” will be shown, click on “Create New” button.

A popup to create new customer will appear.
Input the following details:
- First Name, Last Name: Customer’s name.
- Email: Customer’s email.
- Group: Select customer group
- Telephone: Your customer’s phone number. Depending on your E-commerce site, this option will be unavailable, or not required when creating a new customer. Phone number format might be required.
Click on “Save” to finish creating your new customer.

Adding address to customer #
To create addresses for customers, please follow these steps:
Open Sell Screen.
On the cart section, click on “Change Customer” icon.
The customer list will appears. Find and click on the customer.
Click on customer’s name to show customer’s information popup.

Click on “Address” tab.
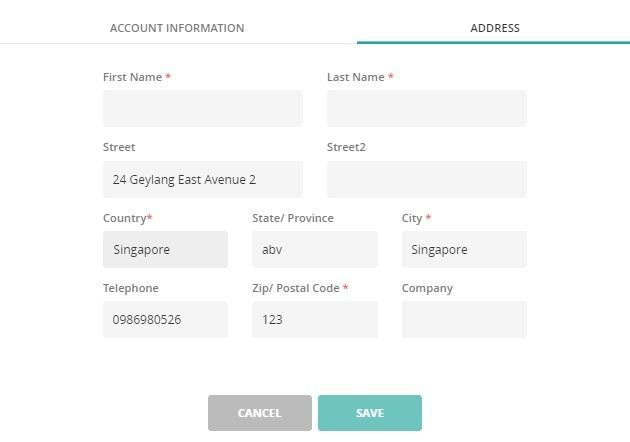
Click on “New Address“.
Input information for customer’s new address. By default, the new address will use Outlet’s address for convenience.
Click on “Save” to create new address.

Please note that you can add address while creating new customer.
Editing customer information #
To edit a customer’s information, please follow these steps:
Open Sell Screen.
Add the customer you wishes to edit to cart.
Click on the customer name to open the customer’s detail popup. You can then edit the customer’s information as needed.
Click on “Save” to finish editing.
Editing customer address information #
To edit a customer’s address, please follow these steps:
Open Sell Screen.
Add the customer you wishes to edit to cart.
Click on the customer name to open the customer’s detail popup.
Click on “Address” tab.
Select the address you wishes to edit.
Edit the address information.
Click on “Save” to finish editing.
Find an existing customer #
One of the data that ConnectPOS synchronizes with Magento is customer data, including all customer information (their contact information, purchase history and reward points) and customer groups.
To find an existing customer in the system:
Click “Guest Customer” to open the search bar.
Type in name, email or phone number to find the customer.
Click on the customer to add to cart.
Check out as Guest #
By default, the order will be checked out with Guest Customer provided that you’ve enabled “Check out as Guest” for the stores in POS Settings.
To enable “Check out as Guest” for a store:
From the sidebar of your Sell Screen, go to Settings > POS Settings > Outlet & Register
Click to choose the store you want
Enable “Allow Guest Customer”Click “Save“


