Print & Email Receipt #
After checking out for your customer, you can choose to print or email the receipt to the customer’s email address.
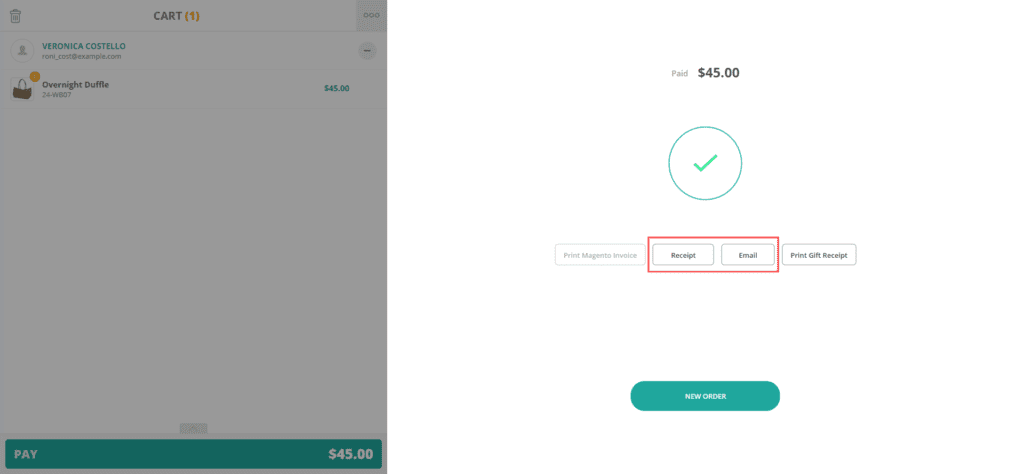
To print a receipt, click Print Receipt. A pop-up with the receipt preview will appear for printing.
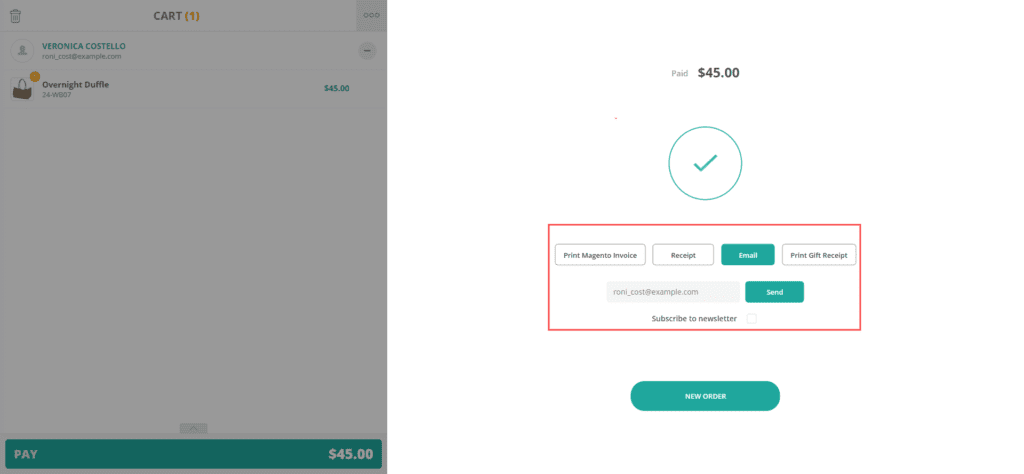
To email a receipt, click Email, fill in the customer’s email address and click Send.
Please note that you can also print and email receipts for partial paid orders, too. They can help with order reference later or work as a reminder for your customers.
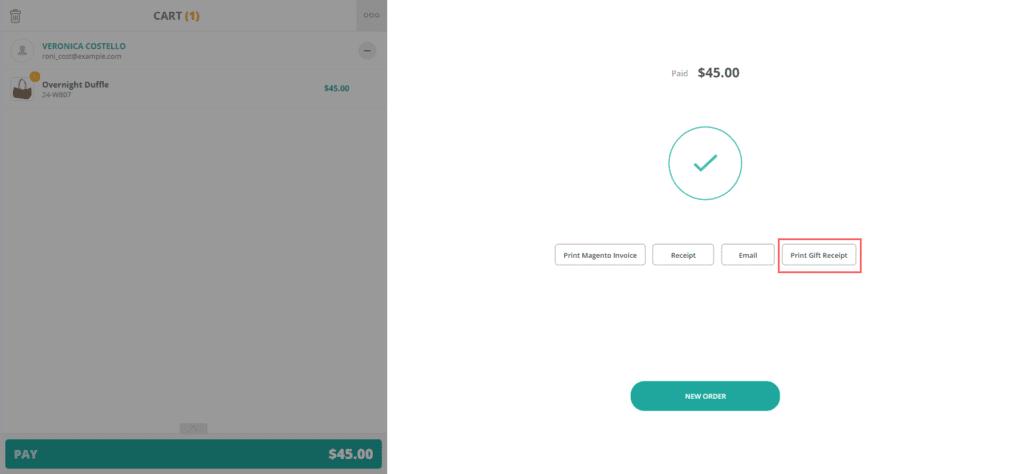
Print a Gift Receipt #
Gift Receipt is similar to a normal receipt, except that it doesn’t display prices and the total value of the order. “Print Gift Receipt” appears as an option on the Checkout screen.
Auto-print a Receipt #
If you want a register to always print a receipt after sales:
- From your Sell Screen, go to Settings > POS Settings > Outlet & Register
- Click to choose the outlet.
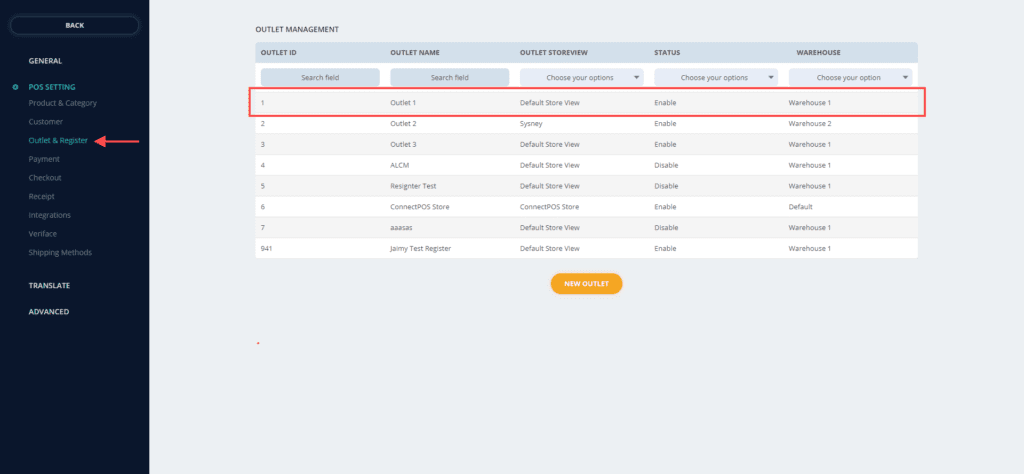
- In the selected outlet, click to choose the register.
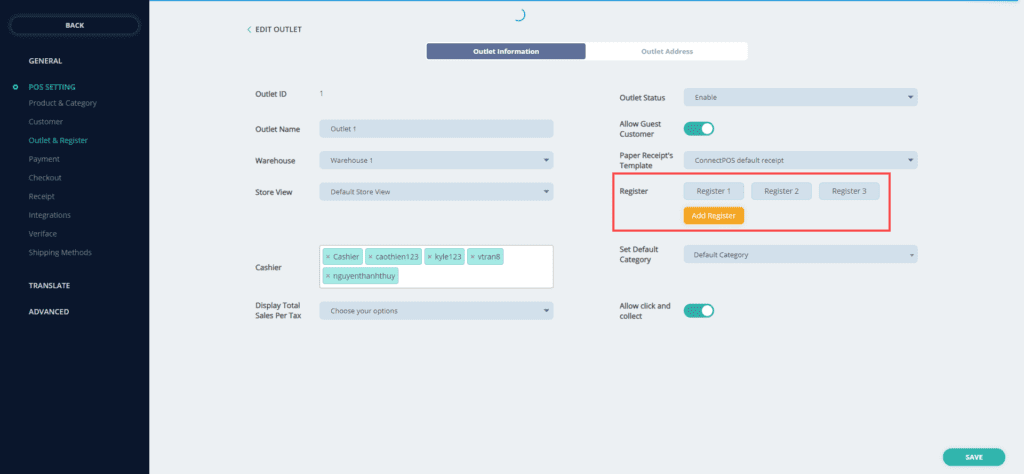
- Enable “Always Print Receipt After Sales”.
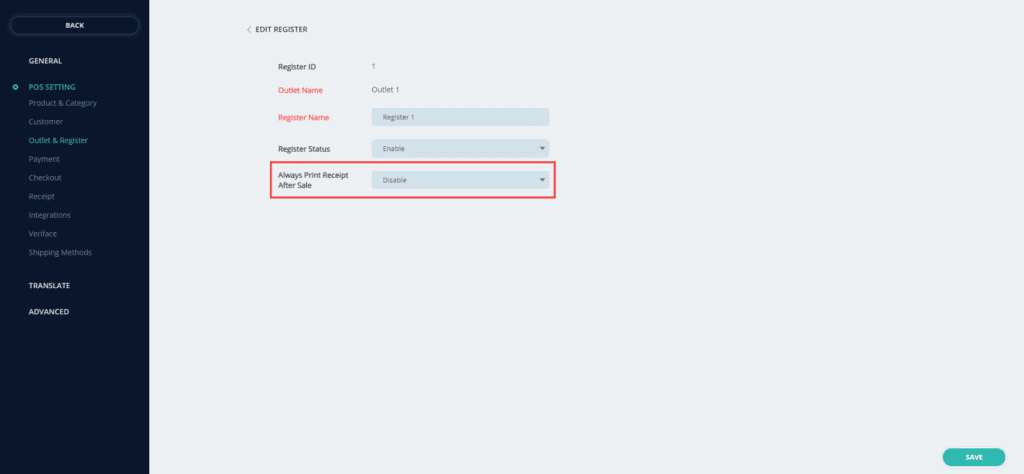
- Click on “Save” to update your configuration.
Reprint/ Re-email a Receipt #
To reprint or re-email a receipt:
- From your Sell Screen, go to Order List.
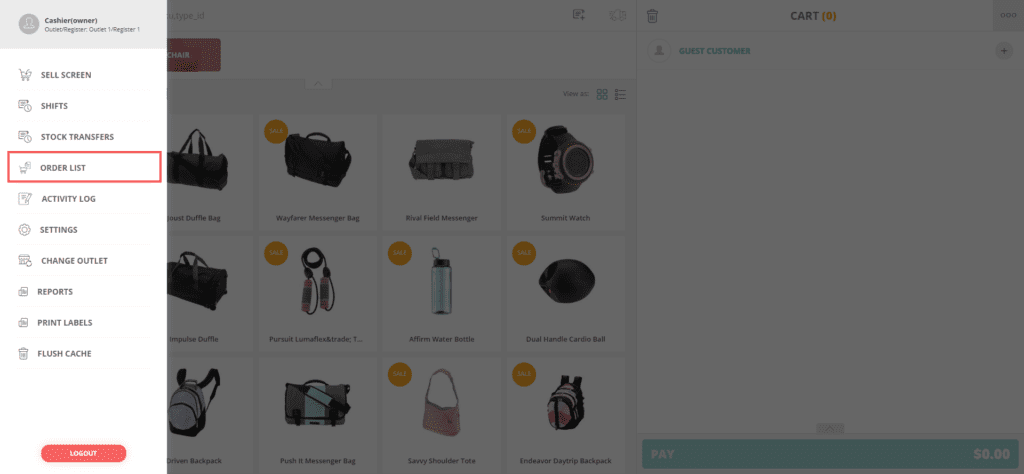
- Find and choose the order you need. Details of the selected order will be displayed on the right section.
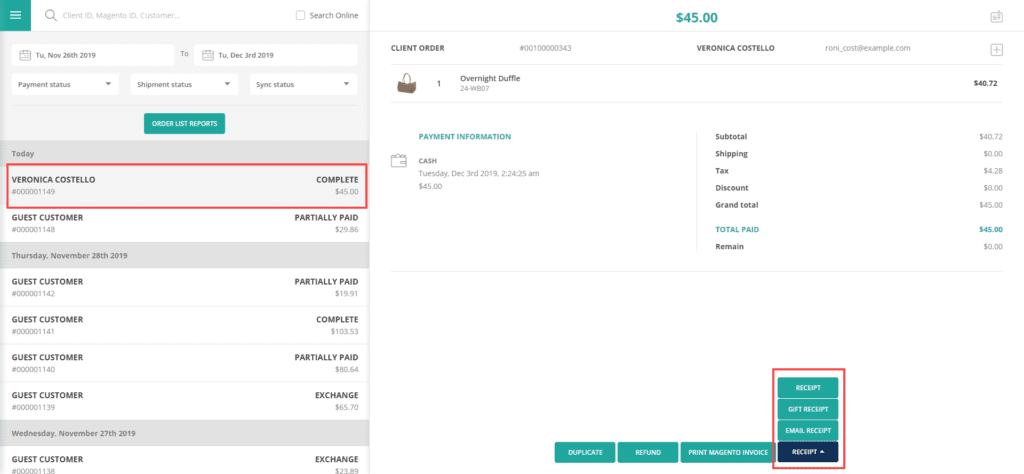
- Click Receipt and choose to print, email or print a gift receipt
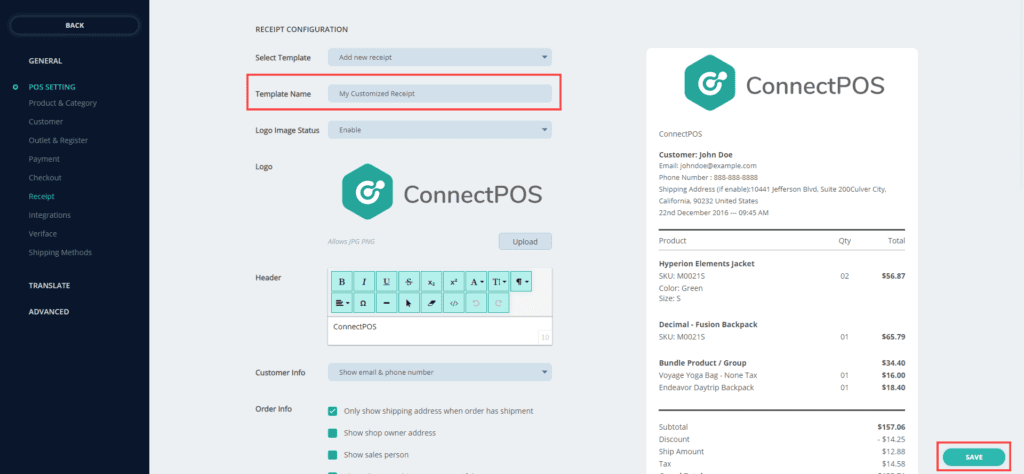
Customize a Receipt #
Each store can have its own receipt template. You can manage all of your receipt templates in Receipt area.
To create a new receipt template:
- From your Sell Screen, go to Settings > POS Settings > Receipt.
- In Select Template, click on “Add a new template”.
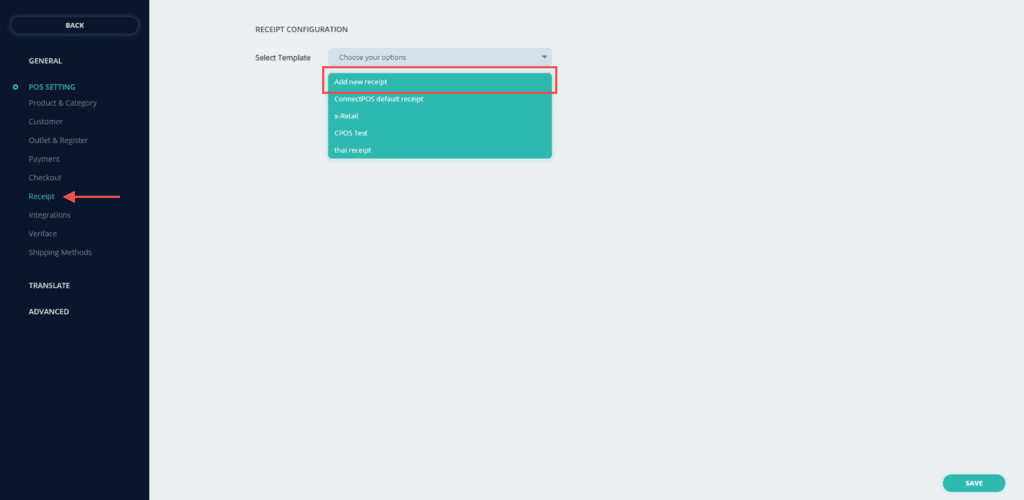
Customize your new receipt template, then click on “Save” to create a new template. The Template name will be required.